
 |
| via Pinterest |
Hey everyone!
I hope you had an *amazing*,
I hope you had an *amazing*,
BBQ,
fireworks,
TONS of sweets, and
- most of all -
family and friends filled 4th!
While my Dad had to work most of the evening, the rest of our family had a pretty nice day - and thankfully, Daddy was able to get off just in time for some dessert! :-)

Crafts, neighborhood walk, watching fireworks on the PBS (couldn't drive to a show this year, so thank goodness for the *awesome* display provided by PBS!)...just a few of the great things about the day.
However, the
best part of the day
would most definitely have to have been the food!!
The 4th of July dinner menu this year:
~ DELICIOUS BBQ chicken! My Mom makes the *best* ever! :-D
~Tangy and Spicy Noodle Salad, with roasted red peppers, cheese, and broccoli.
~Baked Beans
~and Flag Cake
Now, the flag cake was not the typical fruit topped cake that you would usually think of! (love those though!) While browsing through Pinterest (*love* that too, by the way! :-), I found an a collage of some awesome, patriotic themed cakes...

...pretty cool, huh?! :-)
While I wasn't planning on even *attempting* to make any of these, weeks of glancing back at them sure made me want to try!! So, on Independence Day morning, I started baking! I ended up going with the top left cake, and boy was it fun! Well, a tiny bit scary too (I found out that precariously placing super thin cake layers on is not as easy as Cake Boss or Food Network Challenge may have led me to believe - ha ha); but, thank goodness for Mommy, who saved the day with her knowledge of the wonders of having cardboard around the house to help slide layers on easily!! ♥ Also, gigantic thank-yous are due to my awesome brother, Jake, who THANKFULLY noticed that I had placed the top two layers on in the wrong order -- a little
momentary stressing and layer flipping later, the cake was assembled and ready for frosting. So,

Crafts, neighborhood walk, watching fireworks on the PBS (couldn't drive to a show this year, so thank goodness for the *awesome* display provided by PBS!)...just a few of the great things about the day.
However, the
best part of the day
would most definitely have to have been the food!!
The 4th of July dinner menu this year:
~ DELICIOUS BBQ chicken! My Mom makes the *best* ever! :-D
~Tangy and Spicy Noodle Salad, with roasted red peppers, cheese, and broccoli.
~Baked Beans
~and Flag Cake
Now, the flag cake was not the typical fruit topped cake that you would usually think of! (love those though!) While browsing through Pinterest (*love* that too, by the way! :-), I found an a collage of some awesome, patriotic themed cakes...
...pretty cool, huh?! :-)
While I wasn't planning on even *attempting* to make any of these, weeks of glancing back at them sure made me want to try!! So, on Independence Day morning, I started baking! I ended up going with the top left cake, and boy was it fun! Well, a tiny bit scary too (I found out that precariously placing super thin cake layers on is not as easy as Cake Boss or Food Network Challenge may have led me to believe - ha ha); but, thank goodness for Mommy, who saved the day with her knowledge of the wonders of having cardboard around the house to help slide layers on easily!! ♥ Also, gigantic thank-yous are due to my awesome brother, Jake, who THANKFULLY noticed that I had placed the top two layers on in the wrong order -- a little
momentary stressing and layer flipping later, the cake was assembled and ready for frosting. So,
After a torturous wait while it was chilling, we FINALLY cut it and....

Here's how it looked! HOW COOL!!! :-D
Here's the recipe:
Red Cake Layers
- 1
- box Betty Crocker® SuperMoist® white cake mix
- 1
- pint (2 cups) strawberries, stems removed, pureed in blender or food processor to about 1 1/4 cups
- 1/3
- cup vegetable oil
- 3
- egg whites
- 1
- teaspoon Betty Crocker® red gel paste food color
Blue Cake Layer
- 1/2
- box Betty Crocker® SuperMoist® white cake mix (about 1 2/3 cups dry mix)
- {NOTE: We ended up only having enough cake mix in the house for just the red layer -- no worries though, with the awesome recipe for homemade cake mix Mommy found from the blog, "i am baker"! This is the same recipe I used for the delicious Spring Cake I shared with y'all last February, so it really is handy for any cake mix need you may have! }

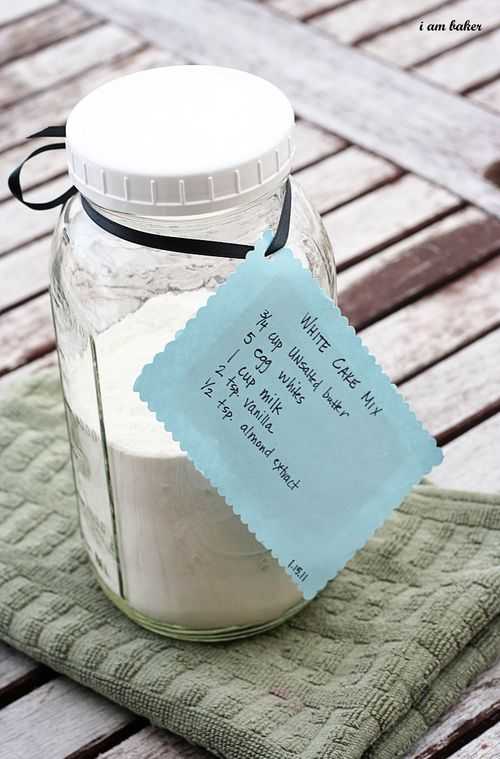 |
| via i am baker |

- 1/2
- cup blueberries, pureed in blender or food processor
- 3
- tablespoons vegetable oil
- 2
- whole eggs
- 1/2
- teaspoon Betty Crocker® blue gel paste food color
White Cake Layer
- 1/2
- box Betty Crocker® SuperMoist® white cake mix (about 1 2/3 cups dry mix)
- 1/2
- cup water
- 2
- tablespoons vegetable oil
- 2
- egg whites
Frosting and Sprinkles
- 3
- containers Betty Crocker® Whipped fluffy white frosting
- Betty Crocker® red, white and blue sprinkles, as desired
- 1To make red cake layers: Heat oven to 350°F. Grease or spray two 8-inch round pans; place 8-inch round piece cooking parchment paper in bottom of each pan. Grease or spray parchment paper. In large bowl, beat red cake layer ingredients with electric mixer on low speed 30 seconds, then on high speed about 2 minutes or until smooth. Spread in pans. Bake 29 to 34 minutes or until top springs back when lightly touched. Cool 10 minutes; run knife around sides of pans to loosen cakes. Gently remove from pans to cooling rack; remove parchment paper. Cool completely, about 30 minutes. Flatten cake layers by trimming off rounded tops. Cut layers in half horizontally to make 4 thin red layers. In 1 layer, cut small round out of center, using 4-inch biscuit cutter. Wrap and freeze 1 thin layer and the layer that was cut out of; save for another use.
- 2To make blue cake layer: Heat oven to 350°F. Grease or spray 8-inch round pan; place 8-inch round piece cooking parchment paper in bottom of pan. Grease or spray parchment paper. In medium bowl, beat blue cake layer ingredients with electric mixer on low speed 30 seconds, then on high speed about 2 minutes or until smooth. Spread in pan. Bake 29 to 34 minutes or until top springs back when lightly touched. Cool 10 minutes; run knife around side of pan to loosen cake. Gently remove from pan to cooling rack; remove parchment paper. Cool completely, about 30 minutes. Flatten cake layer by trimming off rounded top. Do not cut in half horizontally. Cut small round out of center, using 4-inch round biscuit cutter. Wrap and freeze 4-inch round; save for another use.
- 3To make white cake layer: Heat oven to 350°F. Grease or spray 8-inch round pan; place 8-inch round piece cooking parchment paper in bottom of pan. Grease or spray parchment paper. In medium bowl, beat white cake layer ingredients with electric mixer on high speed about 2 minutes or until smooth. Spread in pan. Bake 29 to 34 minutes or until top springs back when lightly touched. Cool 10 minutes; run knife around side of pan to loosen cake. Gently remove from pan to cooling rack; remove parchment paper. Cool completely, about 30 minutes. Flatten cake layer by trimming off rounded top. Cut layer in half horizontally to make 2 thin white layers. In 1 layer, cut small round out of center, using 4-inch biscuit cutter. Wrap and freeze the layer that was cut out of; save for another use.
- 4To assemble cake: Place 1 red cake layer on cake stand or serving platter; spread 1/3 cup frosting on top. Top with 1 white cake layer; spread 1/3 cup frosting on top. Top with second red cake layer; spread 1/3 cup frosting on top. Gently top with blue layer. Carefully spread thin layer of frosting on cut edge inside of blue cake layer. Gently insert white 4-inch cake round; top with frosting and then red 4-inch cake round; press slightly. Frost side and top of cake using remaining frosting. Top with sprinkles. Store loosely covered in refrigerator.
_-*-_-*-_-*-_-*-_-*-_-*-_-*-_-*-_-*-_-*-_-*-_-*-_
Happy Friday!
Linking up with The Farmgirl Friday Blog Hop

No comments:
Post a Comment